Introduction
I first started my journey into the world of photography with two pivotal moments. First, my maternal grandfather, an accomplished semi professional travel and wildlife photographer, gifted me my very first film camera after my mom told him that I had shown interest in the craft. I couldn’t tell you the specific model, but I very clearly remember being overjoyed with the infinite possibilities. (though they were limited to just 36 frames a turn as alas I am older than the digital camera revolution!)
The second formative step in kickstarting my lifelong passion, was taking a class in high school from my photography and art teacher Mr. Russ Croop. Hands down his encouragement and inspiration to experiment lit the fire in me that continues to burn to this day. And I still remember and use so many of his lessons today, which have shaped my top travel photography tips that I’m excited to share with you.
Table of Contents
Understanding Your Camera
Familiarize with Your Settings
I know this may sound obvious, but one of the foundational travel photography tips is to have a solid understanding of your camera’s settings for capturing great photos. Whether you have a DSLR, mirrorless camera, or even a smartphone, knowing how to adjust settings like aperture, shutter speed, and ISO (the sensitivity of the sensor) can make a significant difference. I hate to say it, but reading the manual or following along to online tutorials can make a huge difference in knowing the in’s and out’s of your equipment. I’ve found YouTube to be a great resource and you’ll especially love Mark Galer’s work, if you shoot Sony like I do.
One example of familiarizing yourself would be using a lower aperture (f-stop) to create a shallow depth of field, allowing you to blur the background and make your subject stand out. Conversely, a higher aperture will keep more of the scene in focus, which is ideal for landscapes. Do you know how to set the aperture manually on your iPhone or SLR?
The Decisive Moment
Another role model in my development as a photojournalist was my favorite professor at the University of Colorado, Kevin Moloney. An incredibly accomplished and compassionate photographer in his own right, published in New York Times, National Geographic Society, TIME, Newsweek, to name a few, Kevin is a fount of knowledge. One of my favorite travel photography tips that I learned from him is the importance of studying the masters of photojournalism.
And you can’t talk about the masters without mentioning Henri Cartier-Bresson. He is often regarded as the father of modern photojournalism, and was a pioneering photographer whose work helped define the concept of “the decisive moment.”
So what do we mean by that? I’ll leave it to this nice article by PetaPixel to explain:
The decisive moment is a property of vantage point and framing (and of course timing), and not about the quintessence of the external event. [Henri Cartier-Bresson’s] point is that in the swirl of humanity and nature, all around us, there are occasional fleeting moments where moving objects align naturally in the frame.
I love looking for these moments as I travel. I oftentimes can sense them before they happen, line up the shot I envision in my head, and wait and hope all the elements fall into place. More often than not, they don’t. But when they do, the result feels like magic.
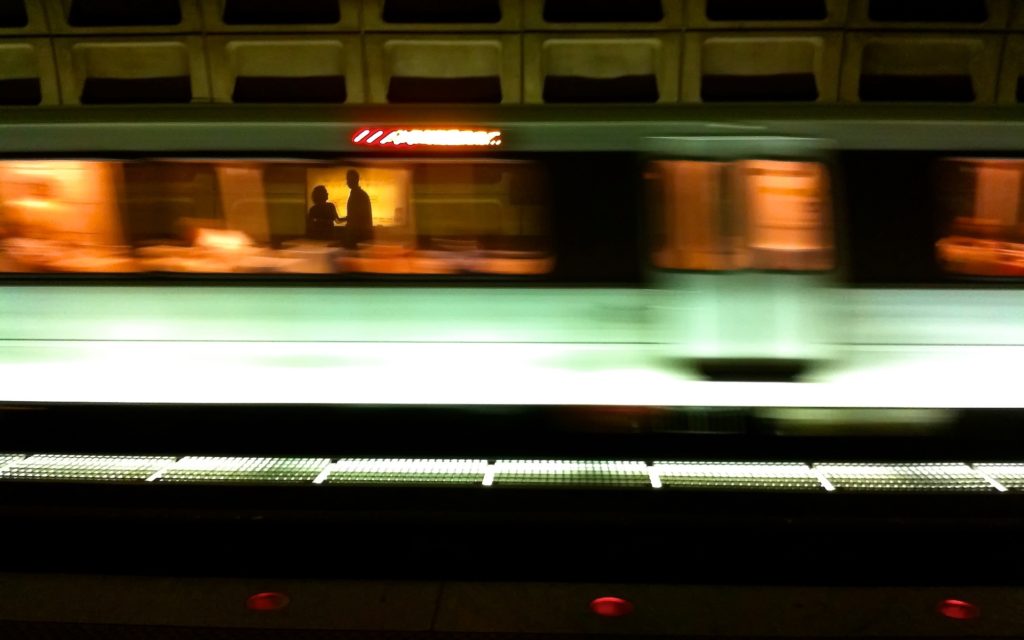
My photo of the couple waiting at the subway platform in Washington, DC felt like one of those moments. I saw them, and the speeding train approaching, held up my iPhone 4, and prayed. I think I took 5-10 images and only the first lined up perfectly in the window.
So my advice for seeking out the decisive moment, is to pause and observe your environment. Leave your camera down. Use your eyes and other senses to observe, and then when you see something developing, get into place and wait!
The Best Camera is the one you have with you
“The best camera is the one you have with you” is a photography mantra that makes total sense in and of itself, and yet it is something we as photographers have to remind ourselves frequently.
This rule is even more true today than ever as nearly everyone has an incredibly powerful and portable camera platform in their pocket. I travel these days with an iPhone 15 Pro alongside my Sony A7R III and often find I reach for the iPhone to capture quick moments. If the subject is more stationary or I can be more contemplative in developing a scene, I’ll check the framing first with my iPhone before getting the big camera set up.
There are real limitations to this day with smartphone cameras compared to the giant sensors on mirrorless cameras like mine (like total resolution or lens selection), but if I’m capturing a fleeting moment, my iPhone wins nearly every time.
NomadTip
Find out the 35mm equivalent focal lengths on your smartphone to help align your two camera platforms. I know, for instance, that the wide angle or 0.5x lens on my iPhone is about 12mm equivalent, the 1x is 24mm, 2x 50mm and 3x 70mm. All four of these lengths are common larger format lens lengths allowing me to quickly grab the right lens for my Sony after checking the scene first with my iPhone.
Mastering Composition Techniques
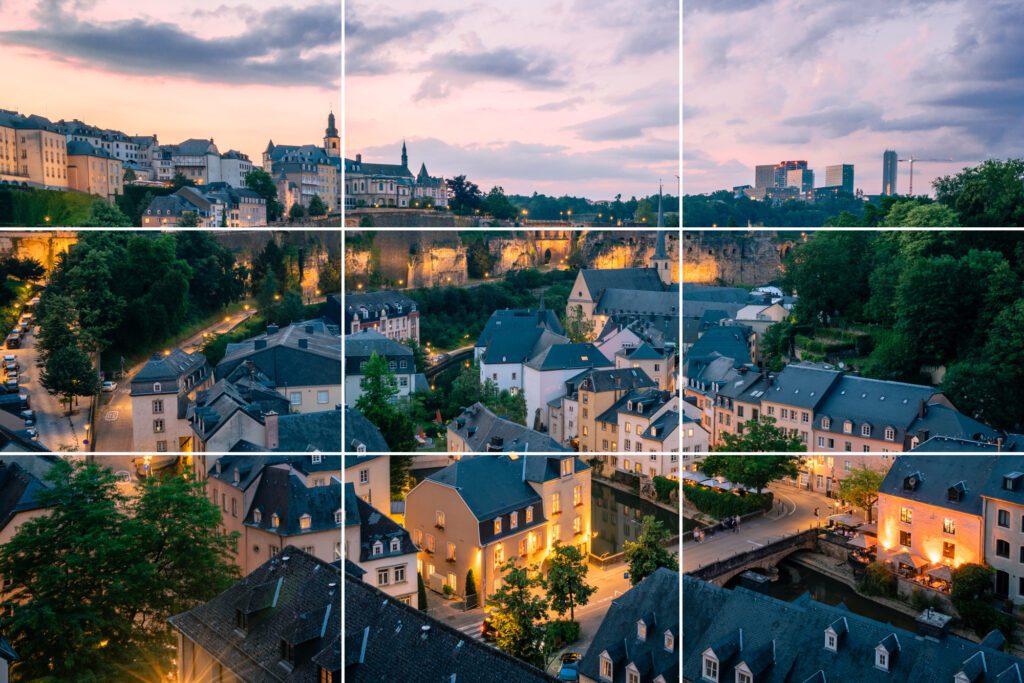
Framing your shot: Rule of Thirds
Whether you’re shooting with an iPhone, a mirrorless camera, or a DSLR, most modern devices come equipped with features designed to simplify the process of taking great photos. One of the most essential techniques to master is the Rule of Thirds. This principle involves dividing your frame into a 3×3 grid and placing key elements along the lines or intersections to create a visually balanced and appealing composition. By thoughtfully aligning your subject, you can enhance the impact of your images and capture scenes that draw the viewer’s eye naturally.
In the image above, I’ve overlaid a 3×3 grid to show how I positioned the horizon along the upper third and placed the bridge and river at the lower right intersection. Instead of centering the horizon or town, I’ve created space for the viewer’s eye to move around the image, telling a story within this unique moment.
Using the Rule of Thirds not only makes your photos more dynamic but also helps convey a compelling story. By placing key features—like a horizon, landmark, or subject—off-center, you create a sense of balance that naturally guides the viewer’s eye across the frame. This technique also adds depth and context to your shots, inviting the audience to explore different aspects of the scene. Experimenting with this method in various settings, such as landscapes or cityscape, reveals how slight shifts in composition can dramatically enhance your images.
Get closer than you think you should
This maxim was one Professor Kevin always encouraged (or was it scolded) us about. In university, I joined the staff of the college newspaper, The Campus Press, later working my way up all the way to Photo Editor by my senior year. We would carry just two lenses with us whenever we went out for a shoot, a 16-35mm wide angle and a 70-200mm telephoto.
The wide angle captured establishing landscape shots, wide expansive architectural scenes, or intimate cultural moments surrounded by people. The telephoto is used to capture action in a sporting match or a tightly framed executive portrait focusing attention on the subject without a distracting background.
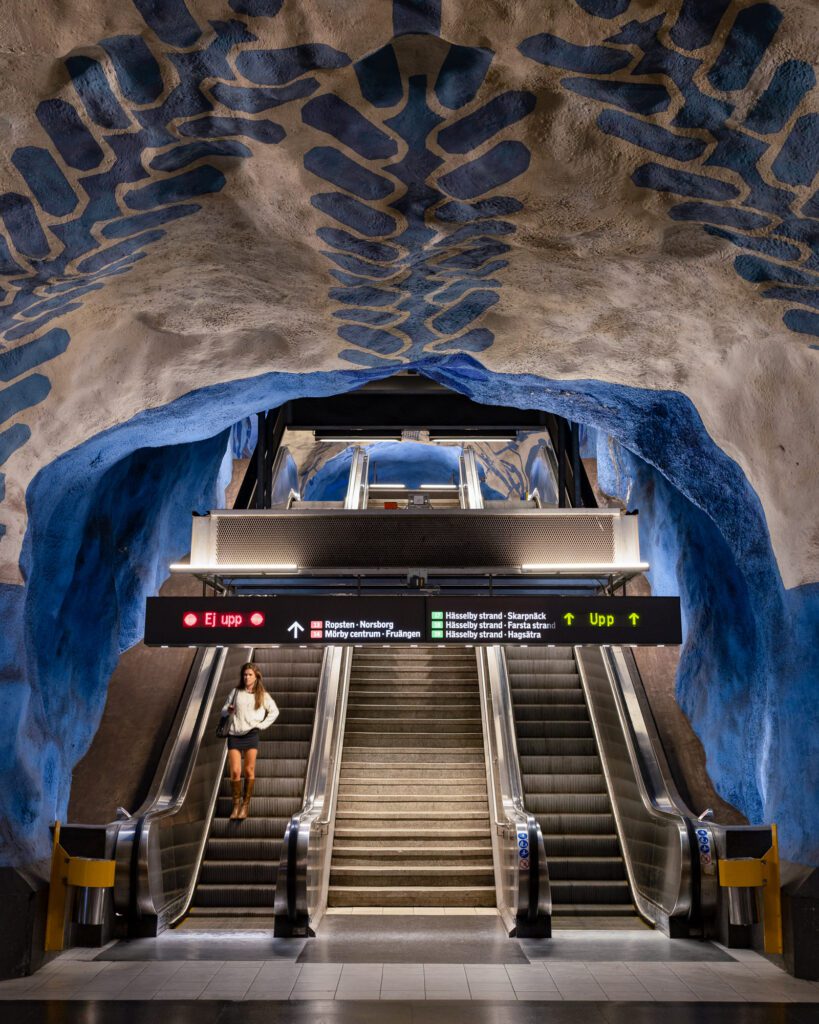
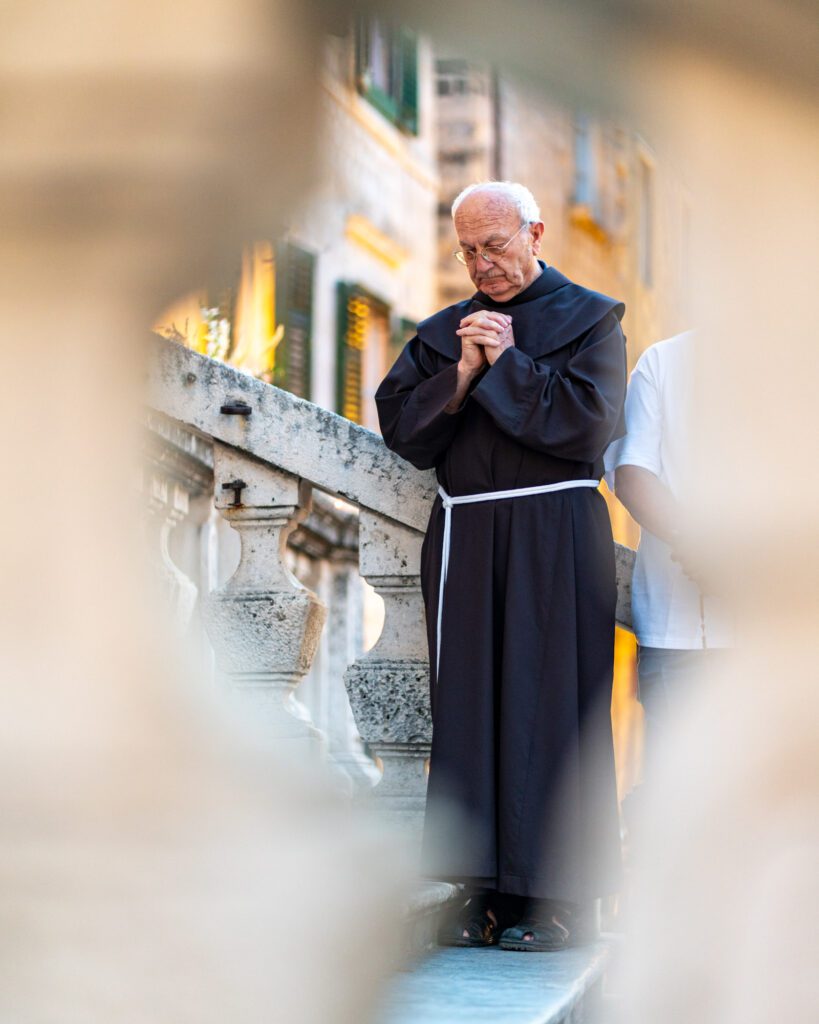
A frequent tip in travel photography is to get closer to your subject than you might initially think—it makes your images feel more intimate and impactful, drawing viewers right into the scene. Kevin’s advice was to never waste a bit of the frame you were presenting to your audience. If you are shooting wide angle, check the edges of the frame – is there too much ceiling or floor? Get closer. Is there extraneous objects that don’t tell the story you want to tell? Crop in.
If your pictures aren’t good enough, you aren’t close enough. — Robert Capa
Some of the most compelling travel photography captures the human spirit, cultural experiences, or a memory of a moment in time between people. A wide angle lens, when used properly, can pull you into a scene better than a shot from middle distance. Upon entering this metro station, in the photo on the left above, in Stockholm Sweden, I was enchanted by the design on the ceiling and how it perfectly lead the eye to the stairs and escalators. All I needed was to wait a few moments for the woman to ride down and complete the image.
This travel photography tip plays off the last by encouraging you to exercise some restraint! Moreover, employing foreground elements can also enhance your composition. By including something in the foreground, like the image above on the right, you can create a sense of depth that leads the viewer’s eye to the main subject, enriching the overall narrative of the photograph.
Focus on Details
While wide-angle shots are essential for capturing landscapes, don’t overlook the details that tell a story. Zooming in on specific elements such as food, local crafts, art, or architectural features can create a powerful connection to your travel experience. These close-up shots often reveal the textures, colors, and nuances that might be lost in broader scenes.

Additionally, consider experimenting with macro photography to capture minute details that draw the viewer’s eye. This approach opens up a new dimension to your travel photography, allowing you to showcase the richness of your experiences. So many travel photos you see on social media and elsewhere are taken by the photographer standing up and holding the camera to their eye. This creates a sameness that permeates through an overwhelming majority of the work out there. Change things up by getting low and getting close.
I really enjoy finding these little details as I walk around cities. The first time I visited Tokyo, I was astounded by the lights, colors, and sounds of the pulsing city all around me. It is easy to become lost in the neon sign and skyscrapers. So when I’m in cities like that, I try and remind myself as a photographer to look for the small details that may get overlooked. In the photo above, I found these old vintage movie posters on the wall of a highway underpass in central Tokyo. I loved the way they were peeling from the wall, as if they had been up there since the films first premiered. (and maybe they had!)
Capturing Unique Moments
Use Light to Your Advantage
One of the most critical elements in photography is lighting, and it can make or break your travel photos. Pay attention to the quality, direction, and intensity of light at different times of the day. Early mornings and late afternoons, known as the ‘golden hours,’ provide soft, warm light that can enhance the colors and textures in your shots. Conversely, midday sun can create harsh shadows, but this can also be used creatively, especially in architectural photography. Don’t be afraid to experiment with light, shadow, and contrast to add drama and depth to your images. A good understanding of how to work with light will elevate your photos from ordinary to extraordinary!
NomadTip
For tracking the sun, moon, stars ahead of time, I use two different smartphone apps that are fantastic. The Photographer’s Ephemeris or TPE (iOS, Web) allows you to see any location on earth and any date in time to plan where the celestial bodies and their shadows will be. I also use Photo Pills (iOS, Android) for much of the same reasons. They also include additional photo tools like timelapse, depth of field, and exposure calculators.
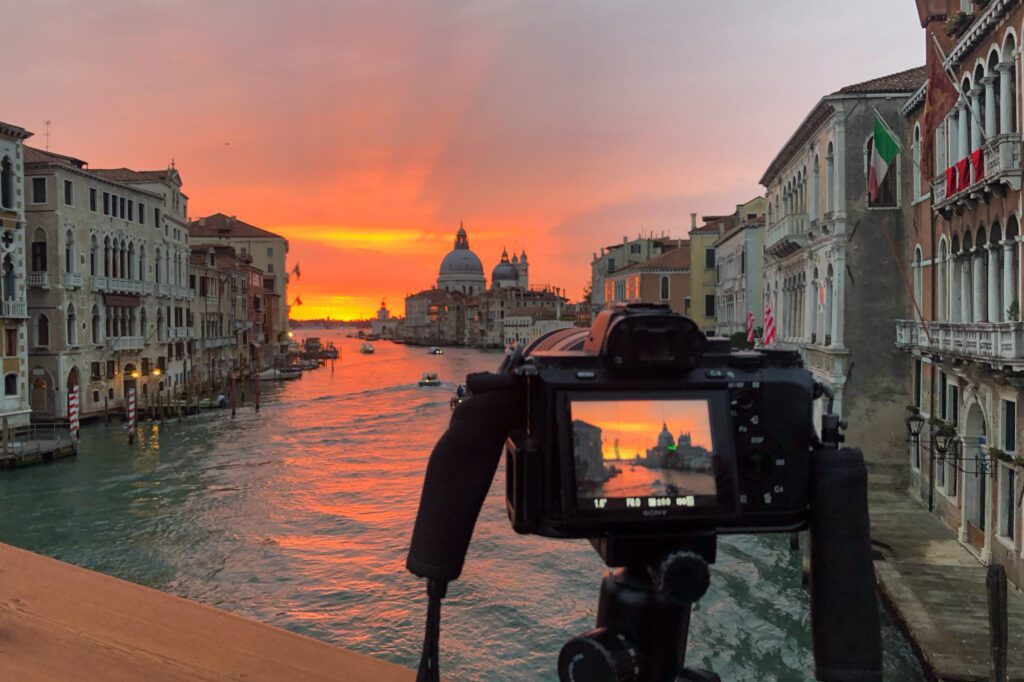
For example, if you’re photographing a street scene with a DSLR during the golden hour, try positioning yourself so the light is coming from the side, casting long shadows and bringing out the textures of the buildings and pavement. If you’re using a smartphone, take advantage of its portability and move around the subject to see how the light affects the shot from different angles. I almost always check a scene first on my phone before hauling out the big camera!
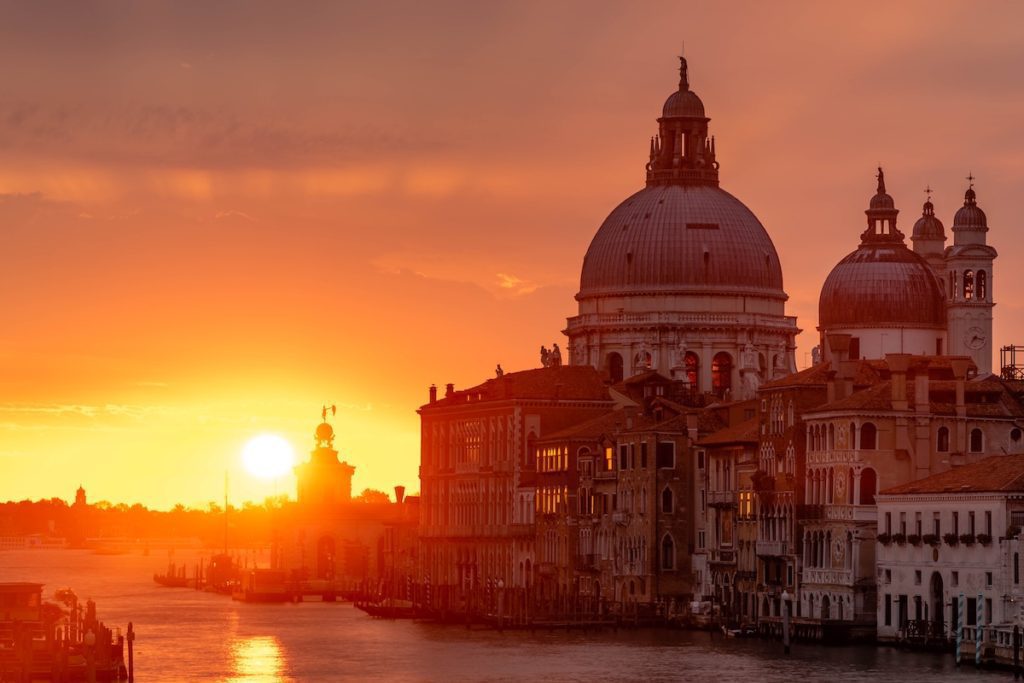
For the scene in Venice, above, I used The Photographer’s Ephemeris app from the NomadTip in this section. I knew that I wanted to get up super early to capture the city before it became inundated with tourists. I am not a morning person in the slightest, but if it means I can capture a beautiful and unique photograph, I’ll rally every time.
Most smartphones also have HDR (High Dynamic Range) settings that can help balance highlights and shadows, especially in bright conditions. For landscapes, using your DSLR’s manual settings to adjust the aperture and exposure can help you capture the soft hues of sunrise or sunset, while a smartphone’s ‘sunset’ or ‘dawn’ mode (if available) can enhance these colors with minimal effort. By observing and adjusting to the natural light, you’ll capture photos that are visually striking and full of atmosphere.
Consider a tripod
A tripod might feel like an extra burden to carry while traveling, but it’s one of the most valuable tools a photographer can bring along. It opens up creative possibilities that simply aren’t achievable with handheld shots. For example, if you’re trying to capture the magic of a city skyline at night or the soft blur of a waterfall, a tripod lets you use a slower shutter speed, ensuring sharpness while creating a beautiful sense of motion. In low-light conditions, where your camera might struggle to keep the ISO (camera sensitivity) low without introducing noise, a tripod can be a lifesaver.
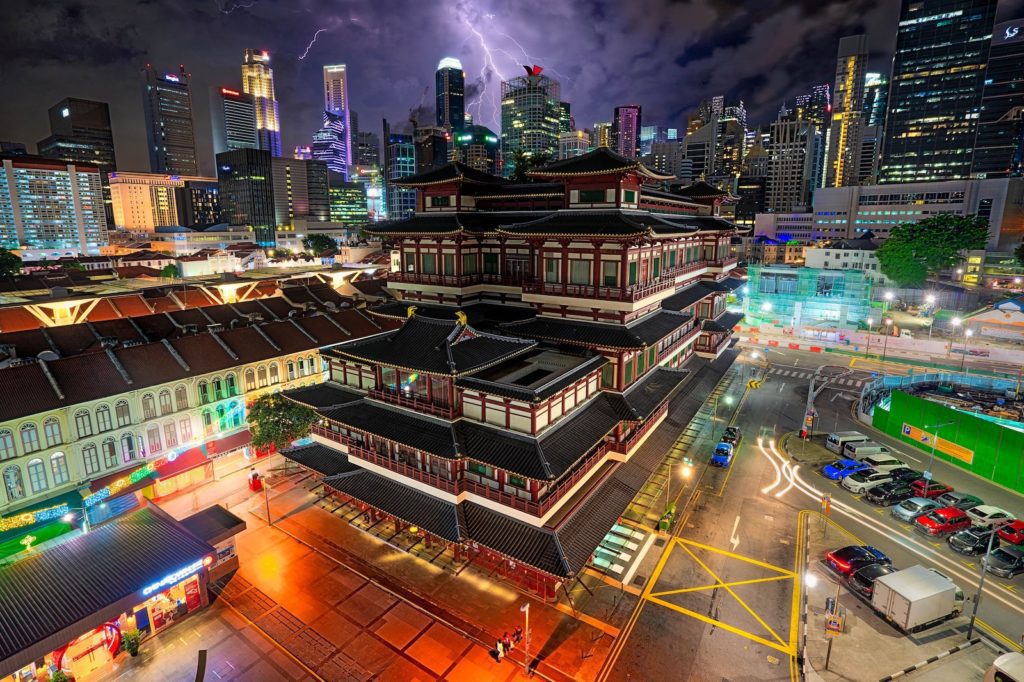
Take the photo below as an example. I climbed this stairwell on a parking garage across the street from the Buddha Tooth Relic Temple in Singapore to get a better vantage point of the thunderstorm rolling in. The street was well lit from the streetlights, but in order to capture the lightning and the car headlights, I had to set the exposure to at least 15 seconds!
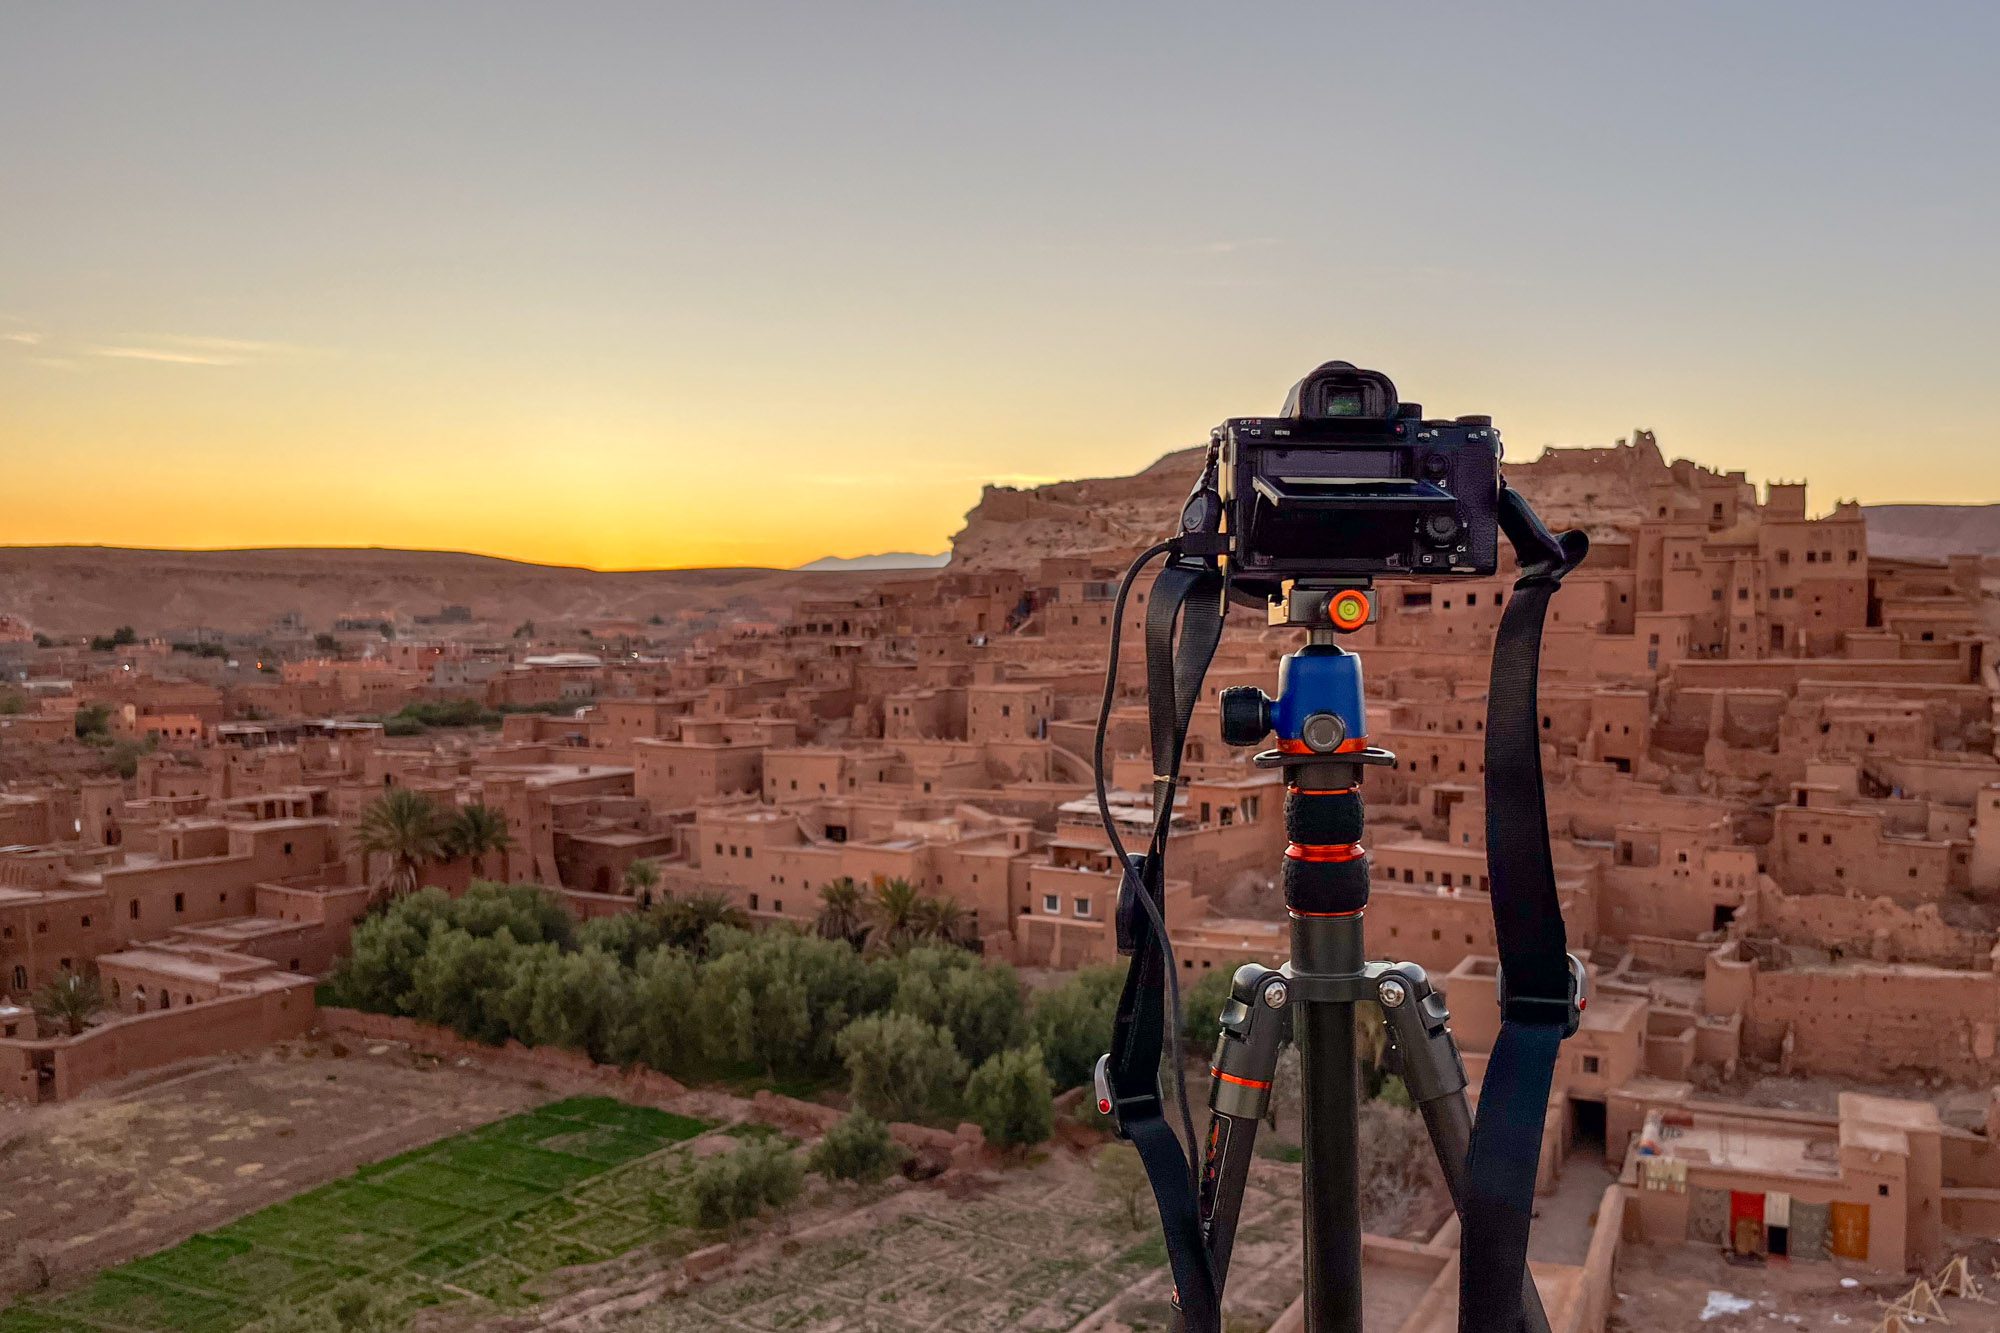
Tripods are also great for taking self-portraits during solo travels, allowing you to step into the scene without the need for a passerby’s assistance (and no more awkward angles!). Even a lightweight, compact travel tripod, like the one I’ve had for a few years, can make a big difference in the quality of your images. If you’re using a smartphone, there are compact tripods with adjustable mounts that work well, and they often come with remote triggers, letting you capture the moment from a distance.
Traveling with a tripod encourages a slower, more intentional approach to photography. It forces you to consider your framing, exposure, and composition carefully before each shot. Instead of snapping away impulsively, you’ll find yourself studying the scene, refining your setup, and capturing images that feel well-thought-out and intentional. So, while it might seem like an extra item to carry, the tripod’s benefits for night shots, landscapes, and self-portraits make it well worth the weight in your bag.
What is the best time of day for travel photography?
The best times are during the golden hour, shortly after sunrise and before sunset, when the light is soft and warm. A great example is the photo in Venice from this article.
Do I need an expensive camera for good travel photos?
While high-end cameras can produce great results, many affordable options can also deliver stunning images. A smartphone camera can work well with the right techniques. I’ve captured some awesome shots with my iPhone.
How can I improve my photography skills?
Practice regularly, study composition techniques, and seek feedback from others. There are a ton of great instructors for free on Youtube or paid on sites like Skillshare.
What editing software is recommended for beginners?
Adobe Lightroom (Mac and PC) and Photomator (Mac only) are excellent choices providing user-friendly tools for enhancing images. I would lean more toward Photomator if you are just getting started.
How do I find my photography style?
Experiment with different subjects and techniques to see what resonates with you. Over time, your unique style will emerge naturally.
What are some must-have accessories for travel photography?
If you are shooting with a camera, invest in a good camera bag, my current and favorite is the Shimoda Explore v2 30L. It can make or break your comfort level as you travel. On smartphones, I would try and get the best camera you can afford. Entry-level models generally cut features in the camera department.
How can I keep my camera and gear safe while traveling?
Exercise your best judgment when using expensive gear in unsafe locations. Insure your equipment against theft or damage, label it with your contact details for easier recovery, and back up your photos regularly to avoid losing valuable memories.
Conclusion
Travel photography is an incredible way to document your journey and share your experiences with others. By understanding your camera, composing shots thoughtfully, and being patient, you can capture stunning images that tell compelling stories. Editing your work effectively and sharing it on the right platforms will maximize its impact, helping you connect with a broader audience.
In summary, applying these essential travel photography tips can truly transform your travel photography, making it not just a hobby but a meaningful part of your travels. With practice and dedication, you will find your unique voice in the world of photography and create visuals that resonate with you and your audience alike.
